Hooks, Floats, Weights, and Rigging Explained
Affiliate Disclosure:
Some of the links in this post are affiliate links. If you click through and make a purchase, I may earn a small commission at no extra cost to you. I only recommend gear I personally use or trust for Pacific Northwest salmon fishing.
When people talk about salmon gear, most of the attention goes to rods and reels. But once your line is in the water, terminal tackle is what actually determines whether your presentation works or not.
Terminal tackle is the final section of the system — hooks, floats, weights, swivels, and the way everything is rigged together. Small mistakes here can ruin an otherwise solid setup, while getting it right makes your bait look natural and keeps fish pinned when it matters.
This post focuses specifically on salmon fishing, with an emphasis on Chinook, and notes for coho where relevant. While some concepts overlap, steelhead float fishing uses different float sizes, weight systems, and hook choices, and deserves its own dedicated breakdown.
This guide breaks down the terminal tackle for salmon fishing I actually use, including hooks, floats, weights, and how I rig everything together for Pacific Northwest rivers.
Table of Contents
What “Terminal Tackle” Means in a Salmon Fishing System
Terminal tackle includes everything tied on after your mainline and leader — the pieces closest to the fish. This is where abrasion, visibility, noise, and rig balance all come into play.
If you want a deeper look at why strong, reliable connections matter throughout the system, see my guide on
→ internal link: Best Knots for Salmon and Steelhead Fishing
Terminal tackle doesn’t work in isolation. It only performs well when:
- Your mainline choice is right
- Your leader material and strength are correct
- Your knots are solid
This post focuses on that final stretch — where presentations succeed or fail.
Hooks for Salmon Fishing
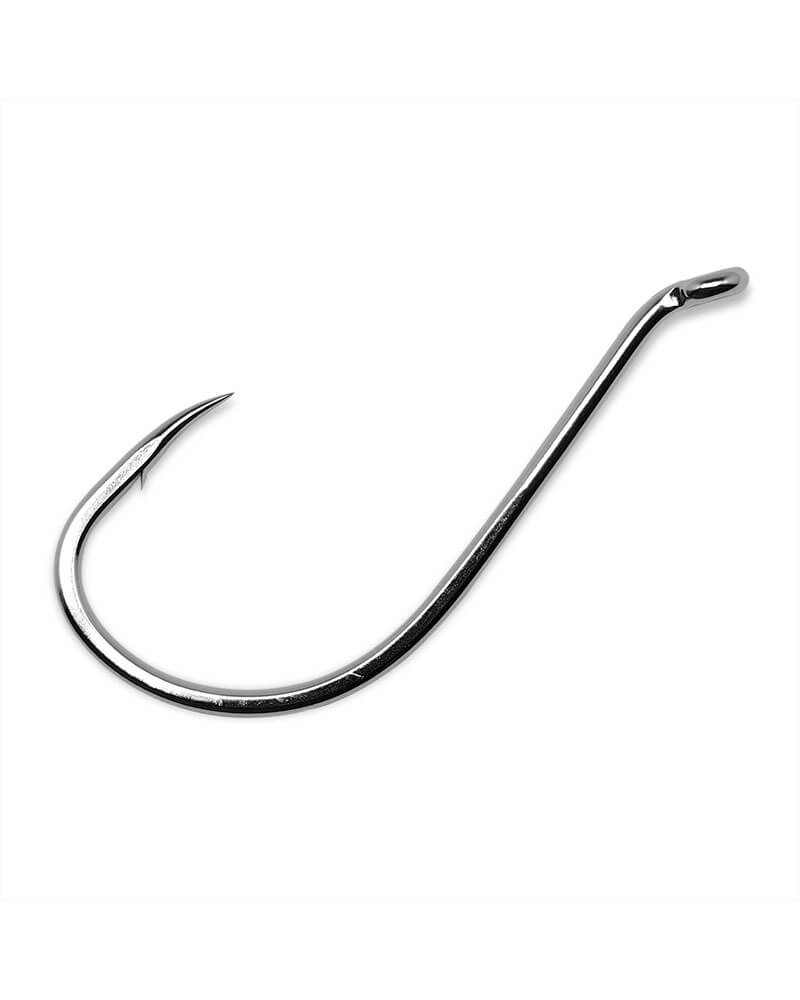
Why I Prefer Octopus Hooks for Bait Fishing Chinook
When fishing bait for Chinook — primarily cured eggs or eggs with shrimp — I strongly prefer octopus hooks.
The main reason is the gap. With bait fishing, you want:
- The bait to sit naturally on the hook shank
- The hook point and barb to remain fully exposed and unobstructed
Soft baits can easily block narrow-gap hooks, leading to missed hooksets. Octopus hooks give enough room for the bait while still leaving plenty of bite.
Octopus hooks are also shaped in a way that helps them rotate in the fish’s mouth. They aren’t true circle hooks, but the slightly turned-in point and rounded bend help the hook find purchase instead of just pulling straight out — especially when float fishing or drifting.
Strength and Sharpness Matter More Than People Think
Chinook will find weak points fast.
I want a hook that is:
- Stout enough not to bend or break under pressure
- Razor sharp out of the package so it penetrates immediately
With bait fishing, you’re not always driving the hook home aggressively. Penetration has to happen quickly and cleanly.
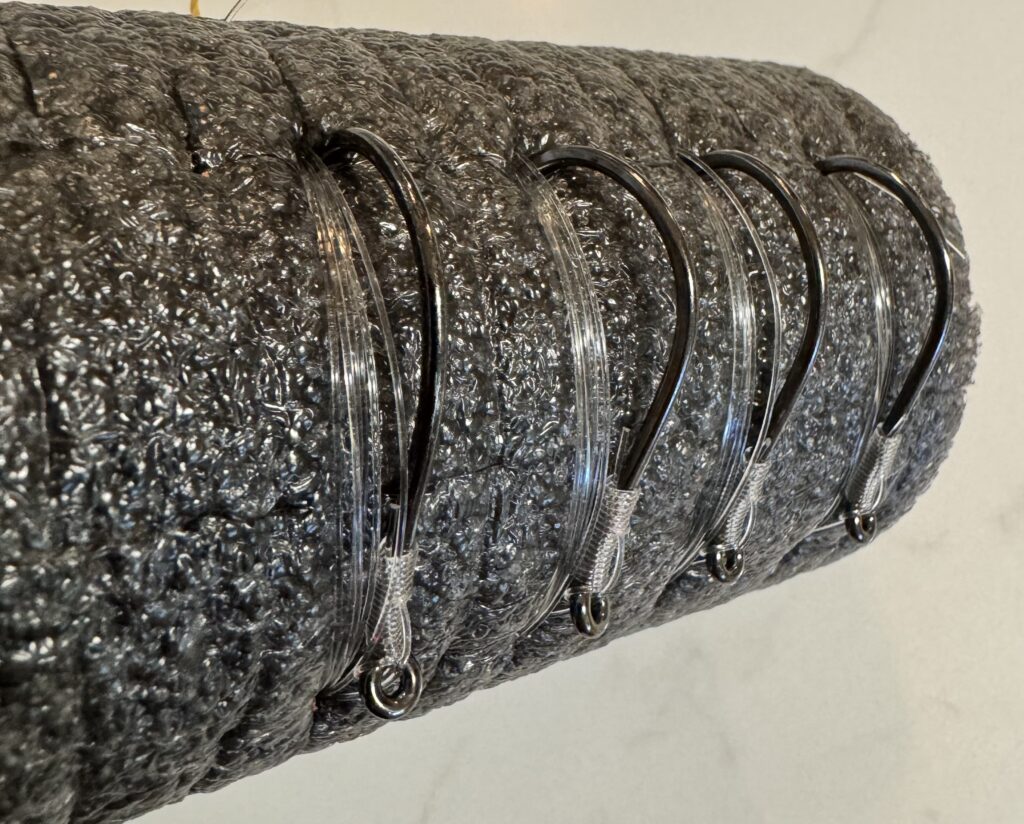
My Go-To Hook and Sizes
Primary choice:
Gamakatsu Octopus Hooks
Sizes I use:
- 5/0 — Chinook salmon in normal conditions (my default)
- 4/0 — Clear water or smaller bait when a stealthier approach matters
- 3/0 — Coho salmon
This sizing gives enough gap for bait while keeping profiles appropriate for conditions and species.
Barbed vs Barbless Hooks (Important Note)
I generally prefer barbed hooks, as they reduce the chances of a fish throwing the hook once it’s pinned.
That said, every angler needs to check their local fish and wildlife regulations. Some rivers or seasons require barbless hooks, and those rules always come first.
Floats and Bobbers for Floating Salmon Baits
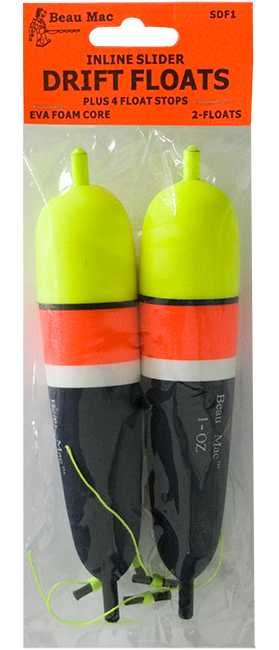
My Go-To Float for Floating Baits
When floating baits, my go-to float is a Beau Mac inline slider EVA plastic float.
Inline slider floats make depth control simple and consistent, especially in varying river conditions. Floats aren’t cheap, so I look for a balance between price and durability.
EVA plastic hits that middle ground.
EVA Plastic vs Foam vs Balsa Floats
- Foam floats are cheaper, but less durable and rarely last season after season.
- EVA plastic floats cost a bit more but hold up far better over time.
- Balsa wood floats are sensitive and effective, but if you’ve ever watched a float drift downriver, you know how painful it is to lose an expensive one.
EVA plastic offers durability without turning every lost float into a bad day.
Beads and Bobber Stops
Inline slider floats typically come with:
- Small beads
- Bobber stops
These handle depth adjustment and component protection, so you usually don’t need to buy anything extra.
Weights for Bobber Fishing Salmon
Sliding Egg Weights (Simple and Reliable)
For bobber fishing, I typically run lead sliding egg weights.
They’re:
- Simple
- Reliable
- Inexpensive
- Easy to adjust
They get the job done without unnecessary complexity.
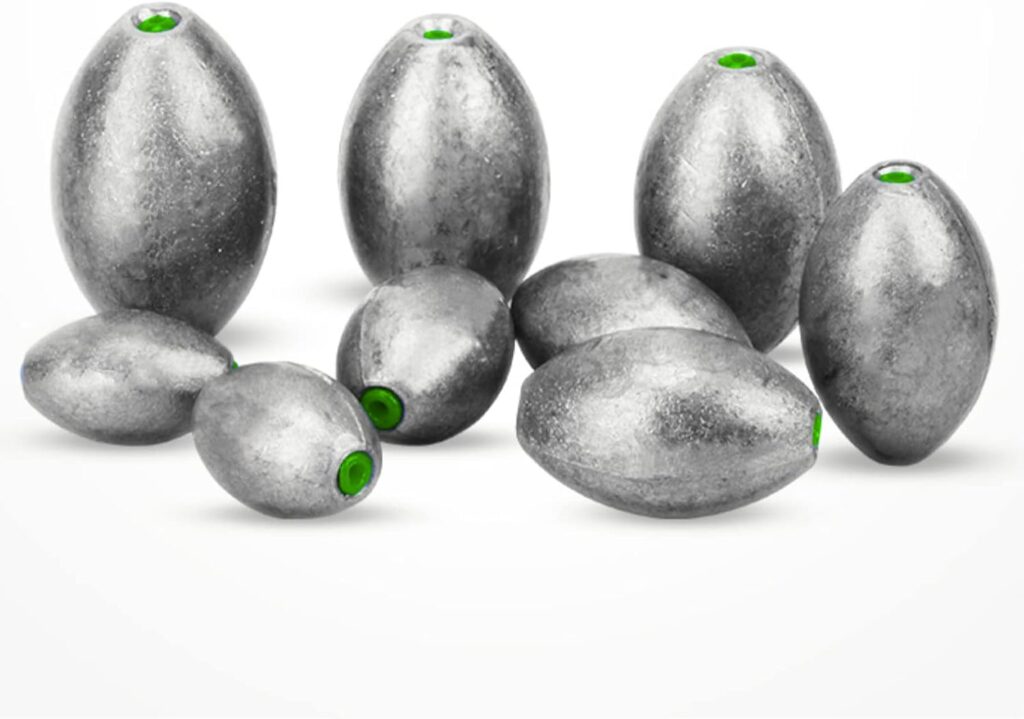
Matching Weight to Bobber Size
I match my weight to my float size:
- 1 oz for normal water conditions
- 1.5 oz when fishing faster or deeper water
If 1 oz isn’t getting the bait into the strike zone early enough in the drift, I bump up to 1.5 oz.
Stealth Adjustments
I keep a few egg weights painted flat black in my tackle box. In clear or pressured water, reducing visibility can make a difference.
Swivels and Small Hardware That Matter
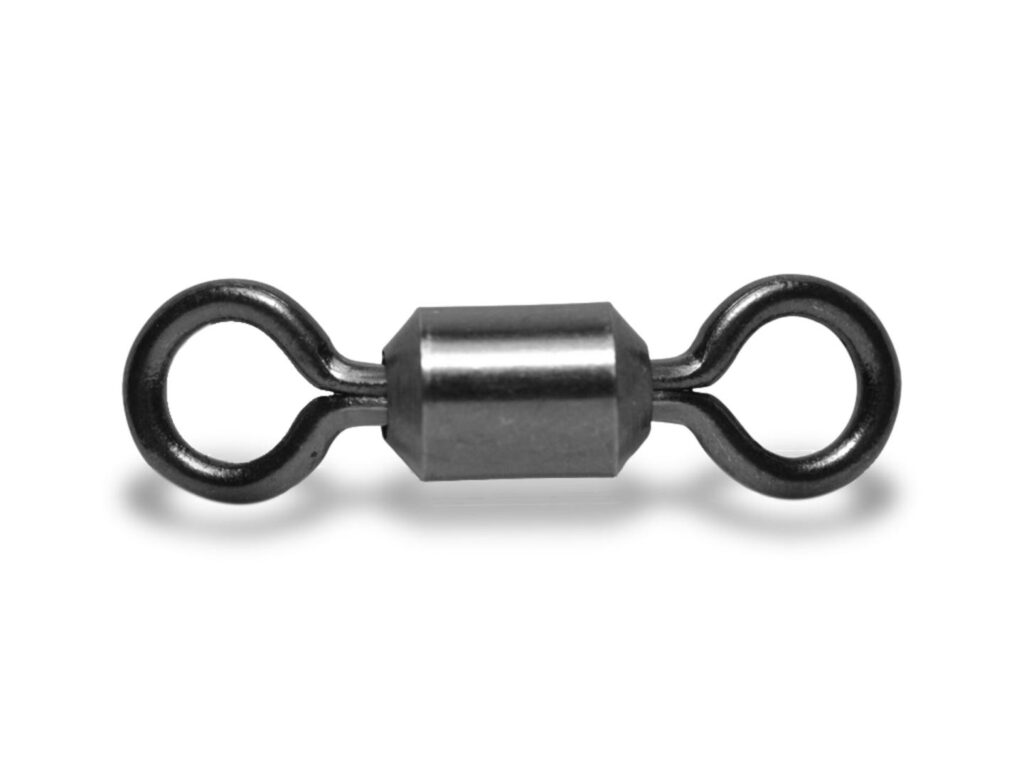
Why I Use a Rolling Swivel Instead of a Standard Barrel Swivel
As swivel strength increases, standard barrel swivels become bulky. With Chinook fishing, you need strength — but bulk adds visibility.
My Go-To Swivel
I use a VMC stainless steel rolling swivel.
At the same strength, it’s noticeably smaller than a standard barrel swivel, which means less hardware for fish to see.
For Chinook salmon, I run the 50 lb test version.
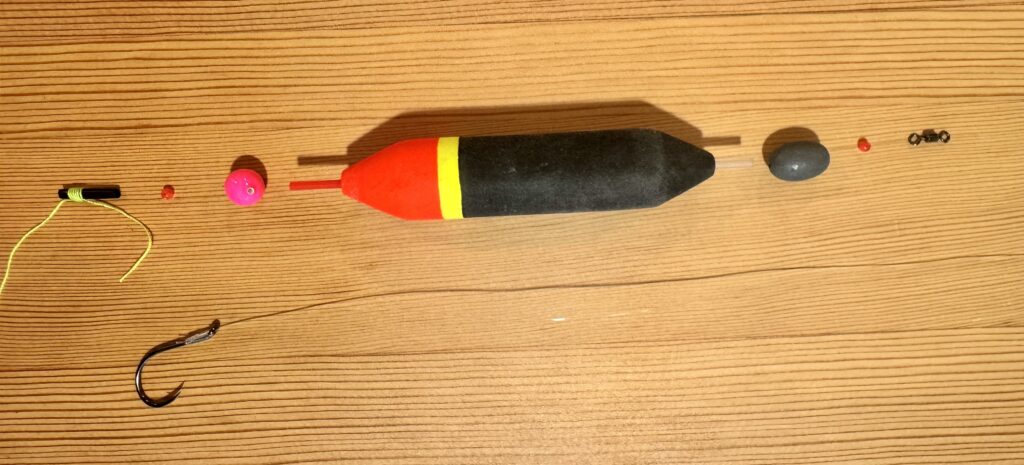
My Exact Salmon Float Rig Setup (Step-by-Step)
This is my float rig order from top to bottom on the mainline:
- Bobber stop
- Small bead
- Corky
- Bobber
- Sliding egg weight
- Second small bead
- Swivel
Why the Second Bead Matters
The second bead below the weight does two important things:
- Protects the knot from abrasion caused by the sliding weight
- Prevents the weight from making a clinking noise if it contacts the swivel
Both matter more than people realize.
Corky Placement and Purpose
I place a bright-colored corky directly above the float.
It serves two purposes:
- Improves visibility when tracking your float
- Acts as a tangle indicator
If the corky is floating in the water off the float, something is tangled and the presentation is wrong. Reel in and fix it.

A size 10 or 12 is usually what I use.
Leader Setup
Below the swivel, I tie my leader.
I usually run pre-tied leaders around 3 feet long, with the hooks already tied. This saves time on the river and keeps things simple.
How Terminal Tackle Ties the Whole Salmon System Together
Terminal tackle is only as good as the system feeding into it. When your mainline, leader, knots, and terminal components all work together, your presentation looks natural and your hookups improve.
If you want to dial in the rest of the system, start here:
- Best Braided Fishing Line for Chinook Salmon Fishing
- Best Leader Line for Chinook Salmon
- Best Knots for Salmon and Steelhead Fishing
This is the terminal tackle system I actually use for salmon fishing — simple, durable, and built for real Pacific Northwest river conditions.